Simple Posting

Free Social Media Planning with WordPress & Zapier Webhooks
Each webhook can represent a different social media channel
(or other connection that Zapier offers).

Version 1.0 (10.02.2024) – tested up to WordPress version 6.4

01
Click on 'Simple Posting' on the left to go to the settings page.
02
Enter "Simple Posting" in the search field.
03
If necessary, scroll down a little and click on "Install now".
03
Click on "Activate".
01
You are in the Zapier dashboard: Click on "Create Zap".
02
Click on "Trigger".
03
Choose "Webhooks by Zapier".
04
Click on the text field next to "Event".
05
Select "Catch Hook".
06
Click on "Continue".
07
Click on "Continue" again.
08
Copy the generated webhook. Insert this as a channel in the plugin settings on your website.
Attention: Add this webhook as a social media channel in the plugin settings and plan a test post before you continue here.
09
Click on "Test trigger".
10
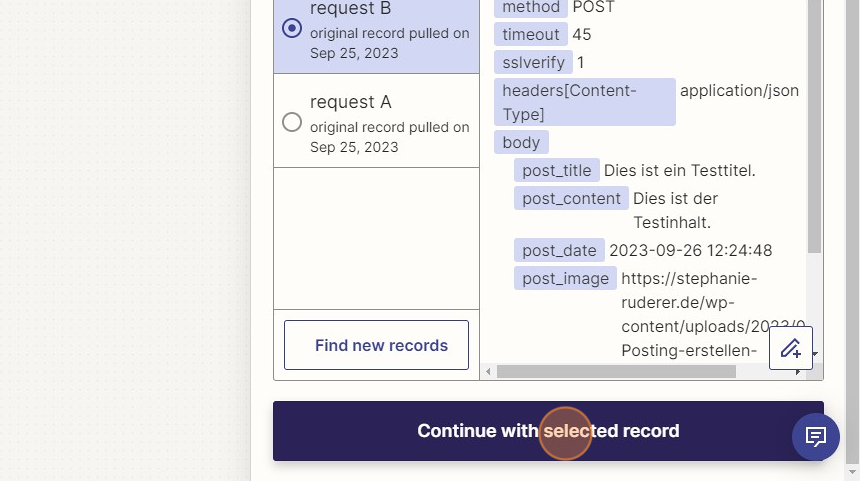
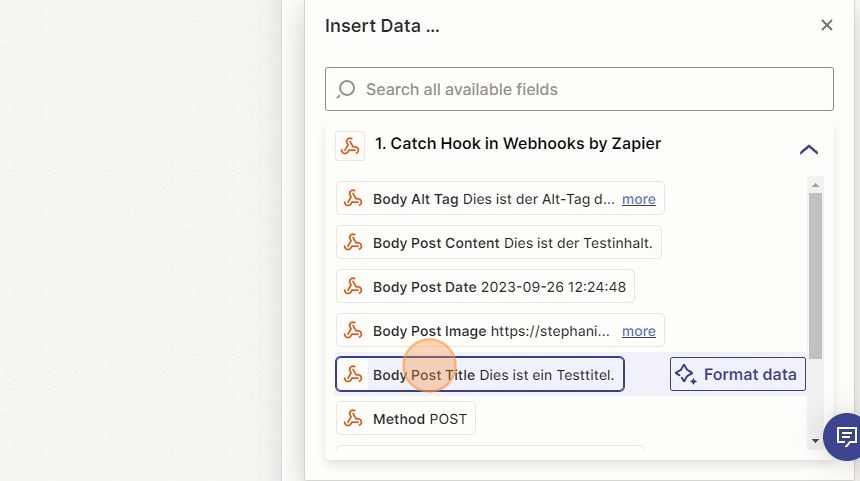
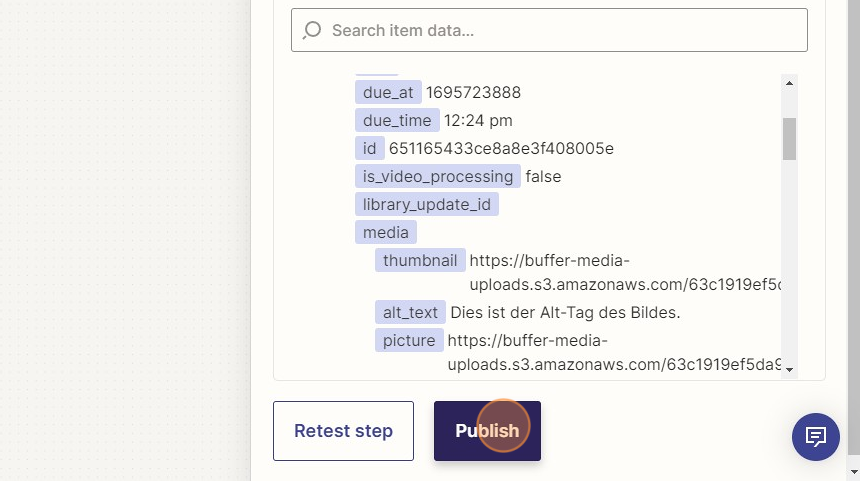
Select the request that contains the previously sent posting data. In this case it is "request B", in yours it may already be "request A" or another one if you have sent the posting several times. Confirm your selection by clicking on "Continue with selected record".
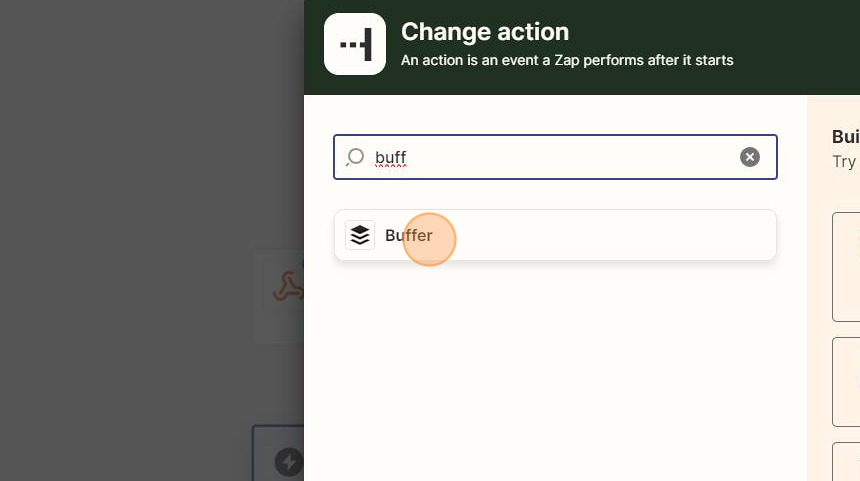
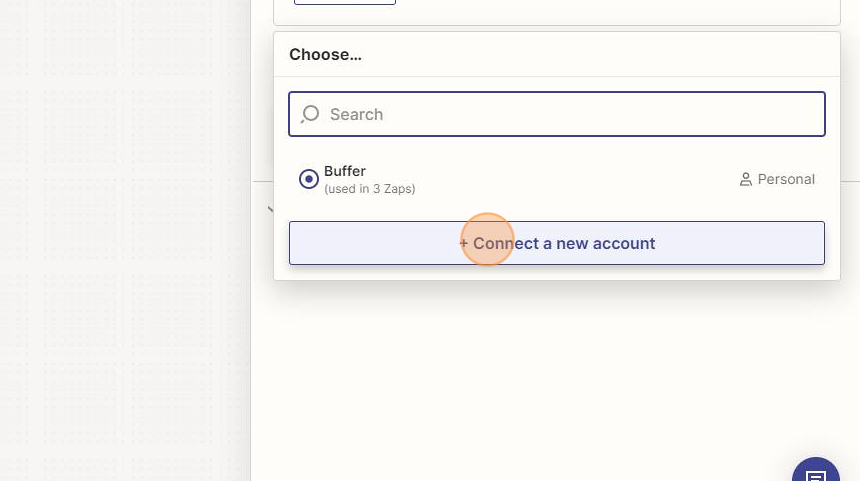
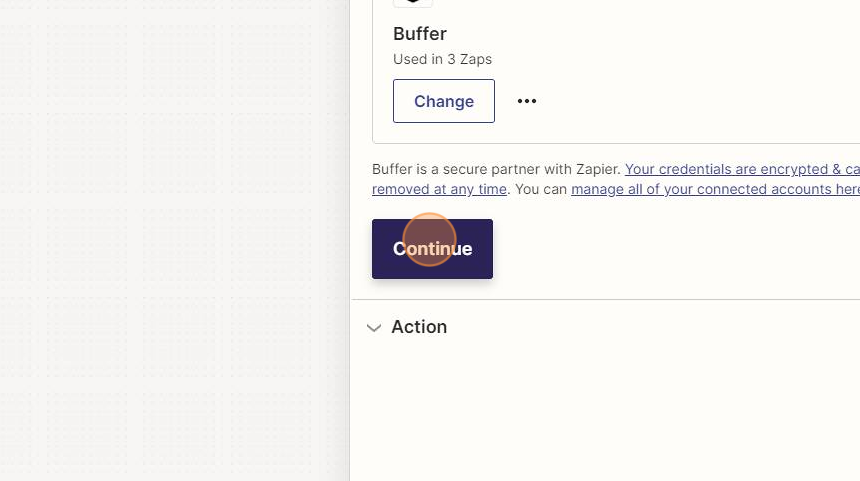
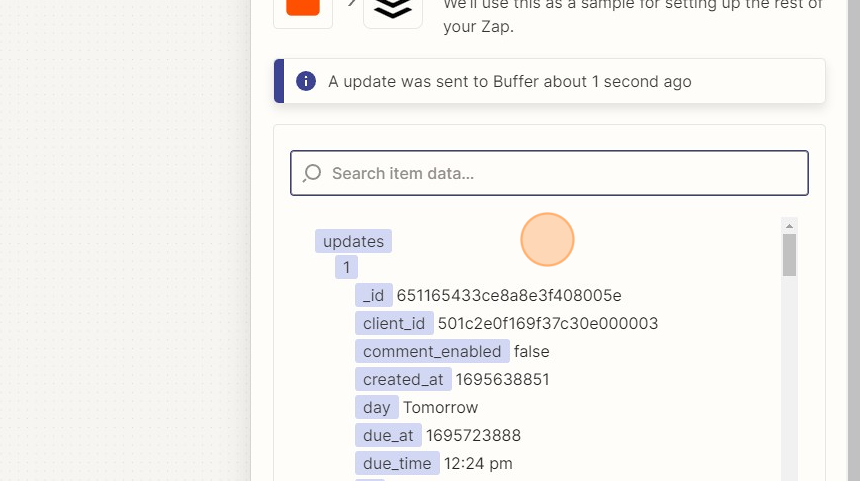
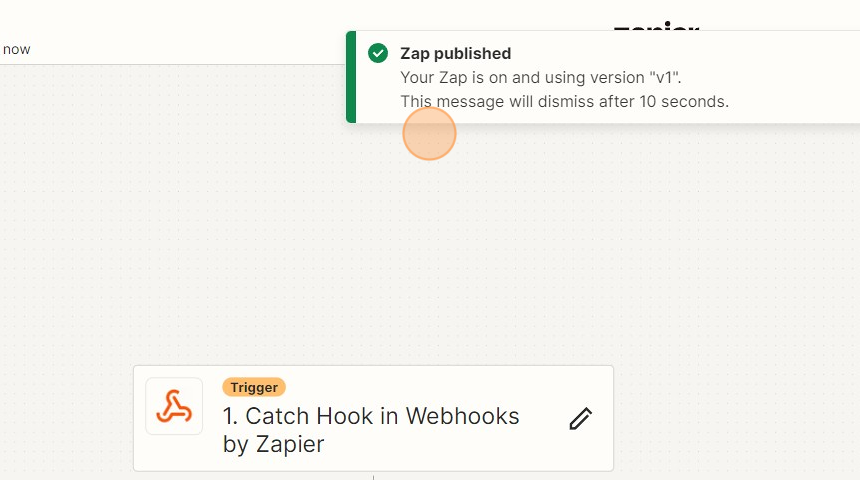
The connection of your website is now complete. Zapier and Buffer are now connected. If you do not want to use Buffer to schedule posts, you will need to apply the next steps to your preferred tool.
11
Search for "Buffer" and select the appropriate entry.
12
Click in the text field next to "Event".
13
Select "Add to Queue" as we want to use the posting data to schedule a post.
14
Click on "Continue".
If you don't have a Buffer account yet, create one at https://buffer.com/ first and connect your social media channels.
15
Connect Zapier to your Buffer account.
16
Click on "Continue".
17
Click on "Choose value" under "Channel". A list of social media channels will appear.
18
Select a social media channel that you would like to connect to this webhook.
19
Click on "Text" to define the content of the post.
20
The test post data from your website will now be displayed. First select the post title "Post Title" by clicking on it.
To insert a blank line between the title and the subsequent content, press the Enter key twice. Otherwise the texts are simply strung together.
21
Then select "Post Content" by clicking on it.
22
Close the selection by clicking on "x".
23
Next, click in the text field under "Media".
24
Select "Image" as we will add an image to the post.
25
Click in the text field next to "Image".
26
Select "Post Image" by clicking on it.
27
Close the selection by clicking on "x".
28
Now click in the text field at "Alt text".
29
Select "Alt Tag" by clicking on it.
30
Close the selection by clicking on "x".
31
Click in the selection field next to "Method".
32
Select "Schedule Post".
33
Finally, the post needs the time at which it should be posted. To do this, click in the text field next to "Scheduled Date & Time".
34
Select "Post Date" by clicking on it.
35
Close the selection by clicking on "x".
36
Click on "Continue".
37
Click on "Test step" to schedule the test data as a test post in Buffer.
38
If the test is successful, Zapier will let you know.
If not, you may have to check your previous entries again and carry out the test again.
39
Finally, click on "Publish" to put the zap online and make it permanently available for your website.
40
Congratulations on planning your first post!
Don't forget to delete the test post on Buffer so that it doesn't get posted.
For all other social media channels that you want to connect to the plugin, follow these steps again.
A little insider tip: Zapier offers the option of duplicating Zaps. This saves you most of the steps.

Note: If you do not have a Zapier account, please create one first at https://zapier.com/.

01
Click on 'Simple Posting' on the left to go to the settings page.
02
First line: enter the name of the social media channel (freely selectable) in the left text field and enter the webhook generated by Zapier to the right of it.
03
Check the box to activate the channel for future postings.
Note: You can deselect the channels for each posting. The checkmark only serves to ensure that the channels are available.
04
Repeat steps 2 and 3 for all other lines or for all social media channels you need.
05
Confirm your changes by clicking on "Save changes".
01
Click on "New Posting" on the left to switch to the edit mode of the posting.
02
Enter the title of the post in the top text field.
03
Enter the content of the post in the large text area. You can use formatting, but not every social media channel will adopt it.
04
You can assign the post to existing categories or create a new one. This allows you to sort by this category later, for example.
05
A good post needs a picture. To add one, please click on "Set featured image".
06
Select the appropriate image by clicking on it.
07
And confirm your selection by clicking on "Set featured image".
08
Some social media channels, such as LinkedIn, allow the image to be given an alt tag. Alt tags describe the image and are used in image searches.
09
Now please select the networks on which this post should be posted.
10
First save your post as a draft by clicking on "Save Draft".
11
Now you can switch to edit mode next to "Publish immediately" by clicking on "Edit" to schedule the post.
12
To do this, select the appropriate date and time when the post should be published on the channels and on your page.
13
Confirm this by clicking on "OK". The "Publish" button changes to "Schedule".
14
Finally, click on "Schedule" and the post will be sent to all previously selected social media channels, represented by Zapier webhooks.

Frequently asked questions:

To reschedule a post, simply reset it to draft mode and reschedule it. You can also duplicate it first if you want to keep the original post.

If you have already scheduled a post and want to delete it from the schedule, you must do this manually in Buffer.

Unfortunately, it is not possible to forward the error messages from Zapier to the posting. Zapier will send you an e-mail if an error occurs, unless you have disabled this.

In the course of the plugin tests, two error categories were identified:

  1. The post is missing something: check whether the title, content, image and alt tag of the image are present and reschedule the post.
  2. Error message „End-Of-Stream“. This is an error with Zapier and not with Simple Posting. The Zap or the posting must be repeated.